
8×10 lifetime shed instructions
8×10 Lifetime Shed Instructions: A Comprehensive Plan
Embarking on an 8×10 shed project? Numerous free plans are available online‚ like those at myoutdoorplans.com‚ offering customization via SketchUp for material lists and designs.
Shedman.ca provides pricing guides‚ while Summerwood’s Sonoma 8×10 plans receive positive reviews regarding thoroughness and ease of use‚ justifying the $100 investment.
Downloadable garden shed plans transform backyards‚ offering expert guidance for building functional and stylish spaces‚ perfect for summer projects and storage solutions.
I. Preparation & Planning
Before commencing your 8×10 shed build‚ meticulous preparation and planning are paramount for a successful outcome. Begin by thoroughly researching local building codes and permit requirements to ensure compliance‚ avoiding potential legal issues down the line. SketchUp emerges as an invaluable tool during this phase‚ allowing for interactive 3D modeling and 2D plan generation‚ streamlining the design process.
Carefully consider the shed’s intended use – storage‚ gardening‚ or a workshop – as this dictates layout and feature requirements. Explore available plans‚ both free resources like myoutdoorplans.com and paid options such as Summerwood’s Sonoma 8×10‚ evaluating their suitability to your needs and skill level.
Develop a detailed material list based on your chosen plan‚ factoring in lumber‚ siding‚ roofing‚ and hardware. A well-defined budget is crucial‚ accounting for potential cost overruns. Finally‚ assess the chosen site for accessibility‚ drainage‚ and proximity to utilities‚ ensuring a stable and convenient foundation for your new shed.
II. Tools & Materials
Assembling an 8×10 shed demands a comprehensive toolkit. Essential power tools include a circular saw‚ drill‚ impact driver‚ and level. Hand tools like a hammer‚ measuring tape‚ speed square‚ and utility knife are equally vital. Safety gear – safety glasses‚ gloves‚ and a dust mask – is non-negotiable.
Material requirements vary based on the plan‚ but generally encompass pressure-treated lumber for the foundation and framing‚ plywood or OSB for sheathing‚ siding materials (wood‚ vinyl‚ or metal)‚ roofing materials (shingles or metal)‚ and fasteners (nails‚ screws‚ and bolts).
Utilizing SketchUp’s bill of materials feature‚ generated from your customized design‚ ensures accurate quantity estimations. Don’t forget concrete blocks or gravel for the foundation‚ door and window units‚ and paint or stain for finishing. Sourcing materials from reputable suppliers guarantees quality and longevity for your shed project.

III. Foundation Construction
A solid foundation is paramount for shed longevity. Begin with site preparation and leveling‚ removing vegetation and ensuring a flat surface. A gravel base installation provides excellent drainage and stability‚ typically 4-6 inches deep‚ compacted firmly.
Choosing between a skid or concrete block foundation depends on site conditions and budget. Skids offer portability‚ while concrete blocks provide a more permanent‚ level base. Ensure proper spacing and leveling of blocks.
Pressure-treated lumber is crucial for any foundation component in contact with the ground‚ preventing rot and decay. Accurate measurements and careful leveling are essential throughout this phase. A well-prepared foundation guarantees a square‚ stable structure‚ minimizing future issues and maximizing the shed’s lifespan.
III.A. Site Preparation & Leveling
Begin by carefully selecting a location for your 8×10 shed‚ considering drainage and accessibility. Remove all vegetation‚ including grass‚ weeds‚ and roots‚ from the designated area. This ensures a clean‚ stable base. Clear away any rocks‚ debris‚ or obstructions that could interfere with foundation construction.
Leveling the site is critical. Use a level and straight edge to identify high and low spots. Excavate high areas and fill low areas with compacted gravel or soil. Regularly check for levelness throughout the process. A perfectly level site prevents structural issues and ensures the shed is square and stable.
Compacting the soil after leveling is essential. Use a hand tamper or plate compactor to create a firm‚ solid base for the foundation. This prevents settling and shifting over time‚ contributing to the shed’s long-term durability.
III.B. Gravel Base Installation
Following site leveling‚ install a gravel base to improve drainage and provide a stable foundation. Begin by outlining the 8×10 shed dimensions with landscape fabric‚ preventing weed growth and gravel migration. Pour a 4-6 inch layer of crushed gravel within the outlined area‚ choosing a ¾-inch gravel size for optimal compaction.
Spread the gravel evenly using a rake‚ ensuring consistent depth across the entire site. Compact the gravel thoroughly with a plate compactor‚ creating a firm‚ level surface. This process is crucial for preventing settling and maintaining the shed’s structural integrity.
Check for levelness again after compaction‚ making adjustments as needed. A well-compacted gravel base provides excellent drainage‚ preventing moisture buildup and protecting the shed floor from rot and damage. This foundational step significantly extends the shed’s lifespan.
III.C. Skid or Concrete Block Foundation
For a portable foundation‚ utilize wooden skids – pressure-treated 4x4s or 6x6s are ideal. Position these skids directly on the compacted gravel base‚ ensuring they are level and parallel. Secure the shed floor frame to the skids with appropriate fasteners‚ allowing for easy relocation if needed.
Alternatively‚ a concrete block foundation offers a more permanent solution. Space concrete blocks evenly around the perimeter of the gravel base‚ ensuring they are level with each other. The number of blocks depends on the shed’s size and weight distribution.
Place shims between the blocks and the floor frame to achieve perfect levelness. This method provides excellent stability and prevents ground contact‚ minimizing rot. Consider using a moisture barrier between the blocks and the wood frame for added protection.
IV. Floor Frame Assembly

Begin by cutting the floor joists to the required length‚ typically using pressure-treated lumber for ground contact resistance. Common sizes include 2x6s or 2x8s‚ spaced 16 inches on center for adequate support. Accurate cuts are crucial for a square and stable floor.
Assemble the floor frame by connecting the joists with the perimeter boards‚ forming a rectangular structure. Use galvanized nails or screws for secure fastening. Ensure the frame is square by measuring the diagonals – they should be equal.
Attach the floor sheathing‚ typically ¾-inch plywood or OSB‚ to the assembled frame. Stagger the seams for increased strength and use construction adhesive in addition to fasteners. This creates a solid subfloor ready for further construction.
IV.A. Cutting Floor Joists
Precise cutting of floor joists is fundamental for a level and structurally sound shed floor. Typically‚ pressure-treated lumber‚ such as 2x6s or 2x8s‚ is used to resist moisture and decay. Determine the total length needed based on your 8×10 shed dimensions‚ accounting for the perimeter boards.
Utilize a circular saw or miter saw to achieve clean‚ accurate cuts. Remember to measure twice and cut once! Consistent joist length is vital. Spacing is generally 16 inches on center‚ dictating the number of joists required.
Consider pre-cutting all joists simultaneously to ensure uniformity. A cutting list will streamline the process and minimize errors. Safety glasses and appropriate hearing protection are essential during this stage. Accurate cuts lay the groundwork for a successful floor frame assembly.
IV.B. Assembling the Floor Frame
With joists cut‚ begin assembling the floor frame on a level surface. Start by laying out the perimeter boards – typically 2x6s or 2x8s – forming a rectangle measuring 8×10 feet. Ensure square corners using a framing square or the 3-4-5 triangle method.
Secure the corners with galvanized nails or screws‚ creating a robust rectangular frame. Next‚ insert the floor joists between the perimeter boards‚ maintaining the 16-inch on-center spacing.
Attach the joists to the perimeter boards using nails or screws‚ ensuring a flush connection. Add blocking between joists for added support and to prevent twisting. Regularly check for squareness throughout the assembly process. A well-assembled floor frame is crucial for the shed’s stability and longevity.
IV.C. Attaching the Floor Sheathing
Once the floor frame is assembled‚ it’s time to attach the floor sheathing‚ typically ¾-inch plywood or OSB. Begin by laying the first sheet of sheathing onto the frame‚ ensuring it overhangs slightly on all sides – about ½ inch is standard.
Secure the sheathing with nails or screws‚ spaced 6 inches apart along the edges and 12 inches apart in the field. Stagger the seams of subsequent sheets for increased strength and stability.
Continue laying and fastening the sheathing until the entire floor frame is covered. Trim any excess sheathing with a circular saw‚ creating a clean‚ even edge. A properly sheathed floor provides a solid‚ level base for the rest of the shed structure‚ ensuring durability and preventing moisture intrusion.
V. Wall Frame Construction

Wall frame construction is a crucial step‚ demanding precision for a structurally sound shed. Begin by cutting the wall studs‚ top plates‚ and bottom plates to the required lengths‚ based on your 8×10 shed plans. Typically‚ studs are spaced 16 or 24 inches on center.
Assemble each wall frame on a flat surface‚ using nails or screws to connect the studs to the top and bottom plates. Ensure the frame is square by measuring diagonally – the measurements should be equal.
Include openings for doors and windows‚ framing them with headers and jack studs for support. Once assembled‚ carefully raise each wall frame into position‚ bracing it temporarily with 2x4s. Secure the walls to the floor frame‚ ensuring they are plumb and aligned before permanently fastening them together.
V.A. Cutting Wall Studs & Plates
Precise cutting of wall studs and plates is fundamental for a square and stable shed. Begin by referencing your 8×10 shed plans for the required lengths of each component. Typically‚ wall studs are cut to a standard height‚ accounting for the top and bottom plates.
Top and bottom plates require accurate cuts to match the perimeter dimensions of the shed – two 8-foot lengths and two 10-foot lengths for a basic rectangle. Use a circular saw or miter saw for clean‚ straight cuts.
Remember to account for the thickness of the plates when calculating stud lengths. Double-check all measurements before cutting‚ and prioritize safety by wearing appropriate eye and ear protection. Accurate cuts minimize gaps and ensure a tight‚ secure wall frame assembly.
V.B. Assembling Wall Frames
With studs and plates accurately cut‚ begin assembling the wall frames on a flat‚ level surface. Lay out the top and bottom plates parallel to each other‚ representing the length of the wall. Position the studs between the plates‚ ensuring consistent spacing – typically 16 or 24 inches on center.
Secure the studs to the plates using nails or screws designed for framing. Ensure each stud is plumb (perfectly vertical) before fastening. For added strength‚ consider using metal framing connectors at the joints.
Repeat this process for all four walls‚ remembering to frame openings for doors and windows according to your plans. Double-check the squareness of each frame using a framing square before proceeding. A well-assembled frame is crucial for a structurally sound shed.
V.C. Raising and Securing Walls
Carefully lift each assembled wall frame into its designated position on the foundation. This step often requires assistance‚ as wall frames can be unwieldy. Ensure the wall is aligned with the foundation and plumb before securing it.
Temporarily brace the walls using 2x4s to maintain their vertical position. Secure the bottom plate of each wall to the floor frame using appropriate fasteners. Then‚ connect the walls to each other at the corners‚ creating a rigid box structure.
Double-check for squareness throughout the process‚ adjusting as needed. Once all walls are raised and connected‚ permanently secure them with nails or screws. Remove the temporary bracing once the structure is stable and self-supporting‚ ensuring a solid base for the roof.
VI. Roof Framing
Roof framing is a critical stage‚ demanding precision for structural integrity. Begin by calculating rafter lengths based on your desired roof pitch. Accurate cuts are essential for a snug fit and weather resistance.
Install the ridge board‚ which forms the peak of the roof‚ ensuring it’s level and securely supported. Rafters are then attached to the ridge board and the top plates of the walls‚ creating the roof’s skeletal structure.
Collar ties‚ horizontal supports between rafters‚ add stability and prevent the walls from spreading. Once the rafters are in place‚ apply roof sheathing – typically plywood or OSB – to create a solid surface for roofing materials. This provides a base for shingles or other chosen roofing.
VI.A. Rafter Cutting & Installation
Precise rafter cutting is paramount for a structurally sound roof. Determine the correct angle for both the top and bottom cuts‚ accounting for the roof pitch and wall plate thickness. Utilize a speed square and circular saw for accurate cuts‚ ensuring consistency across all rafters.
Installation begins with positioning the first rafter pair at the gable ends‚ ensuring they are plumb and aligned. Subsequent rafters are then spaced evenly‚ typically 24 inches on center‚ and secured to the ridge board and wall plates using nails or screws.
Temporary bracing is crucial during installation to maintain rafter alignment until the roof sheathing is applied. Double-check all connections for stability and ensure rafters are flush with the top of the wall plates for a weather-tight seal.
VI.B. Ridge Board & Collar Ties
The ridge board forms the apex of the roof‚ providing crucial support for the rafters. Select a board of appropriate length and thickness‚ ensuring it’s straight and free of defects. Securely attach the ridge board to the gable end rafters‚ maintaining a consistent height throughout its length.
Collar ties are horizontal members installed between opposing rafters‚ preventing them from spreading under load. Position collar ties approximately halfway up the rafter span‚ and securely fasten them with nails or screws. These ties add significant stability to the roof structure.
Properly installed collar ties resist outward thrust‚ minimizing the risk of roof deformation or collapse. Ensure consistent spacing and secure attachment for optimal performance‚ contributing to the overall longevity and safety of your 8×10 shed.
VI.C. Roof Sheathing Application
Roof sheathing provides a solid surface for roofing materials‚ distributing loads evenly across the rafters. Utilize OSB or plywood sheets‚ ensuring they are of appropriate thickness for your local building codes and anticipated snow loads.
Begin applying sheathing at the eaves‚ working upwards towards the ridge board. Stagger the joints between sheets to enhance structural integrity and prevent concentrated stress points. Securely fasten the sheathing to the rafters with nails or screws‚ maintaining consistent spacing.
Leave a small gap between sheathing panels to allow for expansion and contraction due to temperature fluctuations. Proper sheathing application creates a stable and weather-resistant roof deck‚ preparing it for the final roofing material installation‚ ensuring a durable 8×10 shed.
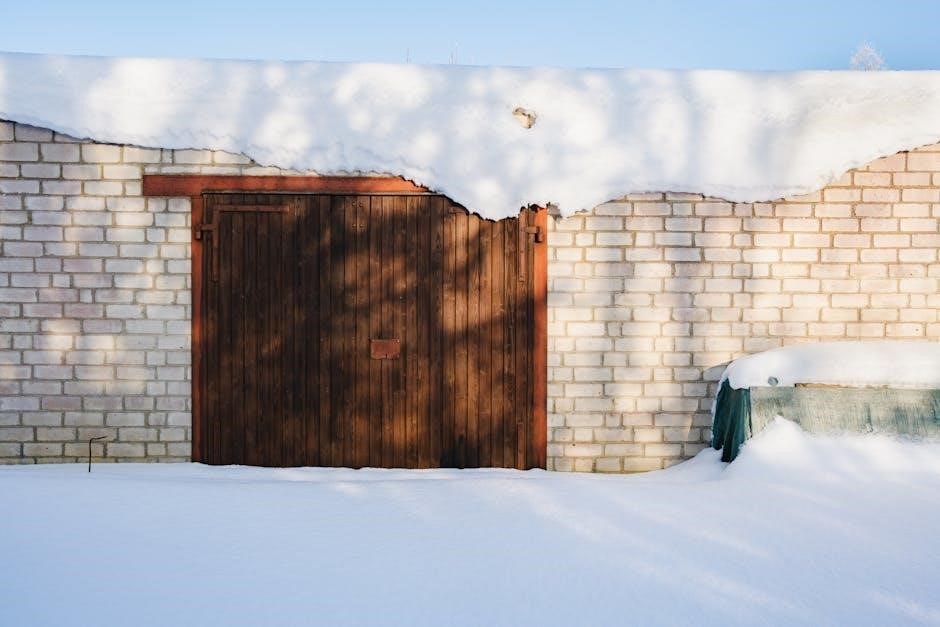
VII. Siding Installation
Siding protects your shed from the elements and contributes significantly to its aesthetic appeal. Common siding options include wood‚ vinyl‚ and engineered wood products; choose based on budget‚ maintenance preferences‚ and desired look.
Start installing siding at the bottom of the walls‚ overlapping each course slightly to create a weather-tight seal. Use appropriate fasteners‚ ensuring they are corrosion-resistant and compatible with the siding material. Maintain consistent spacing and alignment for a professional finish.
Pay close attention to corners and around windows and doors‚ using trim pieces to create clean‚ finished edges. Proper siding installation safeguards your 8×10 shed‚ enhancing its longevity and visual charm‚ providing years of reliable service.
VIII. Door & Window Installation
Installing a door and windows enhances the functionality and security of your 8×10 shed. Begin by carefully framing the openings‚ ensuring they are square and plumb. Select pre-hung doors and windows for easier installation‚ or build your own frames if desired.
Secure the door and window frames to the wall studs using screws‚ ensuring a tight fit. Shim as needed to achieve proper alignment and smooth operation. Install weather stripping around the frames to prevent drafts and moisture intrusion.

Properly installed doors and windows not only improve the shed’s appearance but also provide access‚ ventilation‚ and natural light‚ making it a more usable and enjoyable space. Consider the style and size that best suits your needs.
IX. Roofing Materials & Application

Selecting the right roofing material is crucial for protecting your 8×10 shed from the elements. Asphalt shingles are a popular and cost-effective choice‚ offering durability and ease of installation. Metal roofing provides a longer lifespan and increased weather resistance‚ though at a higher cost.
Begin by applying roofing felt or a synthetic underlayment to the roof sheathing‚ creating a waterproof barrier. Overlap the material properly to prevent water penetration. Then‚ install the shingles or metal roofing according to the manufacturer’s instructions.
Ensure proper overlap and secure fastening to withstand wind and rain. Flashing around vents and chimneys is essential to prevent leaks. A well-installed roof will safeguard your shed and its contents for years to come.
IX.A. Shingle Installation
Starting at the lowest edge of the roof‚ apply the first row of shingles‚ ensuring a slight overhang. Subsequent rows should overlap the previous ones‚ typically by 5 inches‚ creating a watertight seal. Use roofing nails to secure each shingle‚ driving them into the sheathing.
Stagger the joints between shingles in each row to enhance strength and prevent water intrusion. Follow the manufacturer’s recommended nailing pattern for optimal hold. Pay close attention to areas around vents‚ chimneys‚ and roof edges‚ using appropriate flashing to prevent leaks.
Regularly check for proper alignment and secure fastening throughout the installation process. A correctly installed shingle roof will provide long-lasting protection and enhance the aesthetic appeal of your 8×10 shed.
X. Finishing Touches & Customization
Once the structural work is complete‚ personalize your 8×10 shed with finishing touches. Painting or staining protects the wood and enhances its appearance; choose weather-resistant products for longevity. Consider the shed’s surroundings when selecting colors.
Maximize storage space by installing shelves and organizational systems. Plan the layout based on intended use – gardening tools‚ lawn equipment‚ or general storage. Securely mount shelves to the wall studs for stability.

Adequate ventilation is crucial to prevent moisture buildup and mildew. Install vents near the roofline and base of the shed to promote airflow. These final details transform a functional structure into a customized‚ long-lasting storage solution.
X.A. Painting or Staining
Protecting your 8×10 shed’s wood is paramount‚ and painting or staining offers excellent defense against the elements. Prioritize weather-resistant products specifically designed for exterior use to ensure longevity and prevent rot. Thorough surface preparation is key; clean‚ sand‚ and prime the wood before application.
Consider the aesthetic impact; choose colors that complement your property and personal preferences. Lighter shades reflect heat‚ keeping the interior cooler‚ while darker hues absorb sunlight. Staining allows the wood grain to show through‚ offering a natural look.
Apply multiple coats for enhanced protection and a professional finish. Allow each coat to dry completely before applying the next‚ following the manufacturer’s instructions carefully. This crucial step safeguards your investment for years to come.

X.B. Shelf & Storage Installation
Maximizing space within your 8×10 shed requires thoughtful shelf and storage installation. Begin by assessing your storage needs – gardening tools‚ seasonal items‚ or workshop equipment? Plan accordingly‚ utilizing vertical space effectively with shelving units.
Consider building custom shelves from plywood or utilizing pre-fabricated shelving systems. Ensure shelves are securely anchored to the shed’s framing to support weight. Heavy-duty brackets and proper fasteners are essential for safety.
Explore additional storage solutions like overhead racks‚ wall-mounted organizers‚ and workbenches with built-in storage. A well-organized shed enhances functionality and protects your belongings. Don’t forget hooks for hanging tools and maximizing wall space!
X.C. Ventilation Considerations
Proper ventilation is crucial for maintaining a dry and healthy environment within your 8×10 shed‚ preventing moisture buildup and potential mold growth. Stagnant air can damage stored items and compromise the shed’s structural integrity.
Install vents near the roofline to allow hot‚ humid air to escape‚ and lower vents to draw in fresh air. Gable vents are a simple and effective solution. Consider adding a screened vent to prevent insect entry.
For workshops‚ exhaust fans are beneficial for removing sawdust and fumes. Ensure adequate airflow‚ especially if storing sensitive materials. Regularly inspect vents for obstructions and maintain a well-ventilated space for long-lasting shed health and usability.
XI. Utilizing Online Shed Planning Tools (SketchUp)
SketchUp emerges as a premier tool for customizing your 8×10 shed design‚ offering a user-friendly alternative to complex CAD software. Its intuitive interface requires no extensive training‚ making it accessible for DIY enthusiasts.
The platform allows you to create a detailed 3D model of your shed‚ visualizing the final product before construction begins. Input your desired specifications – dimensions‚ window/door placements – and SketchUp generates interactive models and 2D plans.
A significant benefit is the automatic generation of a comprehensive bill of materials‚ along with estimated costs. This streamlines the purchasing process and helps manage your budget effectively. Explore myoutdoorplans.com for resources and tutorials on integrating SketchUp into your shed building project.
XII. Sourcing 8×10 Shed Plans (Free & Paid)
Numerous online resources offer 8×10 shed plans‚ catering to various budgets and skill levels. Myoutdoorplans.com stands out as a hub for free downloadable plans‚ providing a solid foundation for your build. These plans often require some customization‚ which can be achieved using tools like SketchUp.
For a more comprehensive and detailed approach‚ consider paid plans like those offered by Summerwood for their Sonoma 8×10 model. Users report these plans are thorough‚ easy to follow‚ and worth the $100 investment.
Shedman.ca provides valuable pricing guides to aid in budgeting. Remember to carefully evaluate plan contents – material lists‚ measurements‚ drawings – before committing to a specific design‚ ensuring it aligns with your needs and expertise.

XIII. Summerwood Sonoma 8×10 Shed Plan Review
The Summerwood Sonoma 8×10 shed plan receives consistently positive feedback from builders‚ particularly regarding its clarity and ease of implementation. Users highlight the plan’s thoroughness‚ making it accessible even for those with moderate DIY experience.
The $100 price point is generally considered justifiable given the detailed instructions and comprehensive material lists provided. This eliminates much of the guesswork often associated with shed construction‚ saving time and reducing potential errors.
However‚ prospective builders should note that while the plans are detailed‚ some customization may still be desired. Utilizing software like SketchUp alongside the Summerwood plans allows for personalized adjustments and accurate material estimations‚ optimizing the build for individual needs and preferences.