t6 thermostat installation manual
Welcome to the T6 Thermostat Installation Manual. This guide provides step-by-step instructions for installing your new Honeywell T6 Pro thermostat. Ensure a safe and successful installation by following the provided instructions carefully.
The T6 Pro is compatible with 10K ohm sensors and integrates seamlessly with smart home systems. Always follow safety precautions, especially for outdoor use, to avoid damage or hazards.
1.1 Overview of the T6 Thermostat
The Honeywell T6 Pro thermostat is a programmable, Wi-Fi enabled device designed for precise temperature control. It features a sleek, user-friendly interface and compatibility with 10K ohm sensors. The T6 thermostat supports smart home integration, offering advanced temperature management. Its design ensures energy efficiency and seamless operation with hydronic systems. Suitable for various heating systems, the T6 thermostat provides reliable performance and customizable settings for optimal comfort.
1.2 Importance of Proper Installation
Proper installation of the T6 thermostat is crucial for reliable performance and energy efficiency. Improper installation can lead to system malfunctions and safety risks. Following the manual ensures correct wiring, alignment, and placement, preventing potential issues like inaccurate temperature readings or system damage. Always turn off power before starting and double-check connections to ensure a safe and successful setup that meets Honeywell’s specifications for optimal functionality and user safety.
1.3 Safety Precautions for Outdoor Use
When installing the T6 thermostat outdoors, take extra precautions to ensure safety and durability. Avoid exposing the device to direct sunlight, drafts, or heat sources, as this can affect accuracy. Install the thermostat at least 1.2 to 1.5 meters above the floor to prevent tampering and ensure optimal performance. Always follow safety guidelines to protect the device from environmental factors and maintain reliable operation in outdoor conditions.
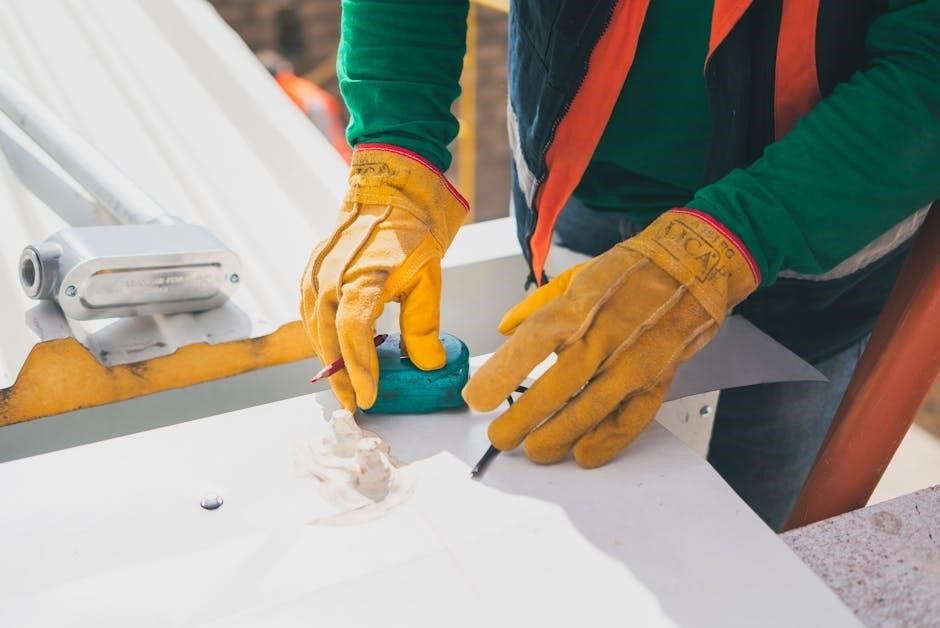
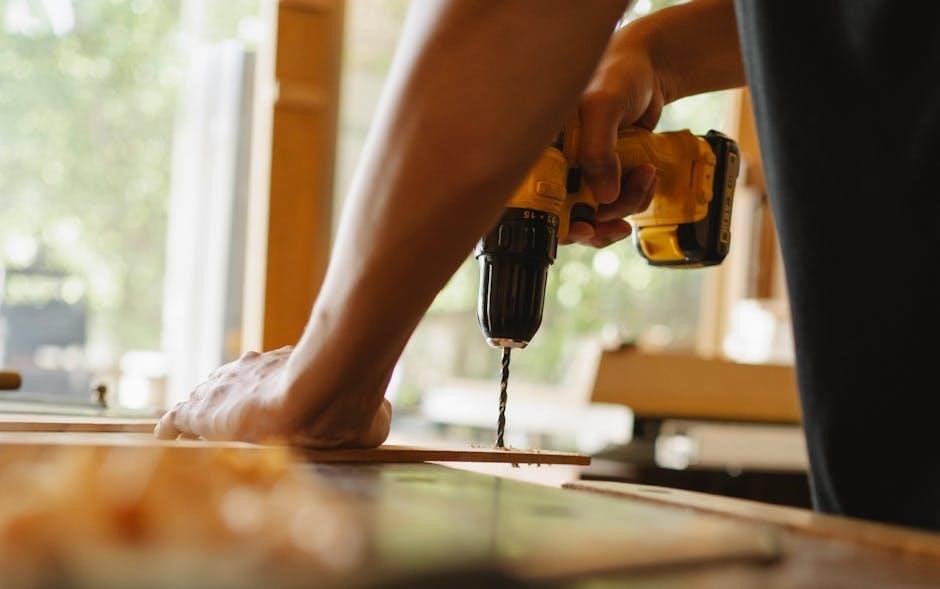
Tools and Materials Needed for Installation
The installation requires basic tools like a screwdriver, drill, and wire strippers. Materials include the thermostat, mounting system, adapter, cover plate, screws, and guides. Ensure 24 VAC power compatibility for a smooth setup.
2.1 List of Required Tools
To install the T6 thermostat, you will need a screwdriver, drill, and wire strippers; Additional tools include a ladder for reaching high installations and a voltage tester for safety. Ensure all tools are readily available to streamline the process. Optional tools like pliers or a level may also be useful depending on your setup. Gather these items beforehand to ensure a smooth installation experience.
2.2 Materials Included in the Package
The T6 thermostat package includes the thermostat unit, a mounting system, adapter, cover plate, screws, and installation guides. These components ensure a complete setup for installation. The thermostat requires 24 VAC power and is compatible with most HVAC systems. The cover plate helps conceal any gaps from previous installations, providing a clean finish. All necessary hardware is provided for a straightforward installation process, minimizing the need for additional purchases.
2.3 Optional Accessories (e.g., Cover Plate)
The T6 thermostat package may include optional accessories like a cover plate, designed to cover gaps left by previous thermostat installations. This ensures a neat and professional appearance. Additional accessories, such as floor temperature sensors, can enhance functionality but are not required for basic installation.
These optional items are available separately and should be installed according to the manufacturer’s guidelines. Ensure compatibility with your system before purchasing or installing any accessories.
Pre-Installation Steps
Before installing the T6 thermostat, ensure the system is prepared; Turn off power, remove the old thermostat, and prepare the receiver box for a smooth installation process.
3.1 Turning Off Power and Removing the Old Thermostat
Before starting the installation, ensure the power to your HVAC system is turned off at the breaker box. This step is crucial for safety. Remove the old thermostat by gently pulling it away from the wall. Disconnect the wires carefully to avoid damage. Take note of the wiring configuration for reference during the new installation. Properly dispose of the old thermostat to complete this step.
3.2 Preparing the Receiver Box for Installation
Inspect the receiver box for any damage or debris. Ensure all components, such as screws and adapters, are included in the package. Carefully remove the receiver box from its packaging and handle it with care to avoid damage. Verify that the box is compatible with your HVAC system and the T6 thermostat. If necessary, refer to the wiring diagram provided in the manual to understand the connections. Proper preparation ensures a smooth installation process.
3.3 Understanding the Wiring Diagram
The wiring diagram is essential for correctly connecting the T6 thermostat to your HVAC system. It illustrates the proper terminals for each wire, ensuring compatibility and safe installation. Identify the corresponding colors and labels on the wires and match them to the diagram’s instructions. This step is critical to avoid electrical issues or system malfunctions.
Take your time to study the diagram thoroughly. It provides a clear visual guide to connect the thermostat to the receiver box and other components; Double-checking the connections against the diagram helps prevent errors and ensures proper functionality.
Installing the Receiver Box
Mount the receiver box near your HVAC system, ensuring proper alignment and placement. Connect the wires as per the wiring diagram for accurate functionality.
Secure the box firmly to avoid any movement. Always turn off power before starting the installation to ensure safety and prevent electrical hazards.
4.1 Mounting the Receiver Box
Mount the receiver box near your HVAC system for optimal performance. Ensure the location is level and secure. Use the provided hardware to fasten the box firmly to the wall or base. Avoid areas with moisture or extreme temperatures. Align the box properly to ensure all connections will be accessible. Double-check the placement before securing to prevent rework. Follow the manufacturer’s guidelines for the recommended installation height and surroundings. Proper mounting ensures reliable operation and longevity of the thermostat system. Always turn off power before starting the installation process. Safety first;
4.2 Connecting Wires to the Receiver Box
Connect the wires to the receiver box by matching the terminals according to the wiring diagram. Ensure all connections are secure and not loose. Use the provided wire nuts or screw terminals for a reliable connection. Double-check the wiring diagram to confirm correct wire assignments. Avoid crossing or pinching wires during installation. Once connected, verify that all wires are properly seated and tightened. This step is critical for the thermostat to function correctly. Always turn off power before handling wires to prevent electrical shock.
4.3 Ensuring Proper Alignment and Placement
Ensure the receiver box is properly aligned with the wall and surrounding area. Use a level tool to confirm it is straight and evenly positioned. Align the UWP with the thermostat and gently push until it snaps into place. Verify that the thermostat is securely fastened and level. Avoid placing it near drafts or heat sources. Proper alignment ensures accurate temperature readings and optimal performance. Double-check the placement before securing it permanently to ensure it meets all safety and functionality requirements.
Mounting the T6 Thermostat
Mount the T6 thermostat by aligning it with the UWP and gently pushing until it snaps into place. Ensure it’s level and secure for accurate performance.
5.1 Aligning the Thermostat with the UWP
To align the T6 thermostat with the Universal Wall Plate (UWP), ensure both are level and properly oriented. Match the thermostat’s mounting tabs with the UWP’s slots. Gently push the thermostat onto the UWP until it clicks securely into place. This ensures proper installation and prevents any operational issues. Make sure the thermostat is centered and aligned correctly for optimal functionality and aesthetic appeal.
5.2 Securing the Thermostat in Place
Once aligned, gently push the thermostat onto the UWP until it clicks. Use the provided screws to secure it firmly to the wall plate. Ensure the thermostat is level and tightly fastened to prevent movement. Avoid overtightening to prevent damage to the device or wall. Once secured, verify that all connections are stable and the thermostat operates smoothly. Proper securing ensures reliable performance and longevity of the device.
5.3 Adjusting the Thermostat Position
After securing the thermostat, adjust its position as needed for optimal performance. Ensure it is level and not tilted. Use the built-in leveling tool or a small wrench to fine-tune the alignment. Proper positioning ensures accurate temperature readings and smooth operation. Avoid placing it near drafts, direct sunlight, or heat sources to maintain precise control. Once adjusted, test the thermostat by setting different temperatures to confirm functionality. This step ensures your system operates efficiently and effectively.
Connecting the Wiring
Connect the wires to the correct terminals, ensuring proper alignment with the wiring diagram. Match the wires carefully to avoid errors. Secure them firmly to maintain reliable connections.
6.1 Identifying the Correct Wire Terminals
Locate each wire terminal on the T6 thermostat and receiver box. Refer to the wiring diagram provided in the manual to ensure correct identification. Match each wire color or label to its corresponding terminal. Proper identification is crucial for safe and accurate installation. Double-check the connections before proceeding to avoid any electrical issues. Use the guide to confirm compatibility with your system’s wiring setup.
6.2 Connecting the Wires to the Thermostat
Match each wire to its corresponding terminal on the thermostat, ensuring proper alignment. Gently push the wires into their terminals until they click securely. Avoid forcing connections, as this may damage the terminals. Check that wires are snug and not loose. Refer to the wiring diagram for accurate connections. Once connected, verify the setup by turning the power on and testing basic functions. Ensure all wires are correctly seated to prevent malfunctions and ensure reliable thermostat operation.
6.3 Double-Checking Wire Connections
Inspect each wire connection to ensure they are securely fastened and correctly matched to their terminals. Tug gently on each wire to confirm it is firmly seated. Cross-reference the wiring diagram to verify accuracy. Turn the power on and test basic thermostat functions, such as heating or cooling, to ensure proper operation. Double-checking connections helps prevent malfunctions and ensures reliable performance. Accurate wire connections are critical for the thermostat to function correctly and safely.
Configuring the Thermostat Settings
After installation, turn the power on and set the time and date. Program the thermostat according to your preferences for optimal performance and energy efficiency.
7.1 Turning the Power On
Once all connections are secure, locate the breaker box or main power switch. Flip the switch to restore power to the system. Ensure the thermostat lights up or displays a startup screen. Verify that the device is functioning correctly by checking the display for any error messages. If the thermostat does not power on, double-check the wiring connections and ensure the circuit is properly energized. Contact a licensed electrician if issues persist.
7.2 Setting the Time and Date
After powering on the thermostat, navigate to the menu to set the time and date. Use the navigation buttons to select the correct time zone, hour, and minute. Ensure the date is accurate, including the day of the week. Confirm your settings to save them. The thermostat will now display the current time and date, essential for scheduling and programming. Accurate time settings are crucial for proper thermostat operation and energy management.
7.3 Programming the Thermostat
Programming the T6 thermostat allows you to set temperature schedules for energy efficiency. Navigate to the menu, select “Program,” and choose between 7-day, 5-2, or 5-1-1 scheduling. Set your desired temperature points for each day, ensuring comfort and energy savings. Confirm your settings to activate the schedule.
Review your programmed schedule to ensure accuracy. Adjust as needed to optimize performance. Enable features like geofencing or smart recovery for enhanced energy management. Proper programming ensures your thermostat operates efficiently, aligning with your lifestyle and preferences.

Compatibility and Integration
The T6 thermostat is compatible with 10K Ohm sensors, hydronic systems, and integrates seamlessly with smart home systems via Z-Wave technology for enhanced functionality and control.
8.1 Compatibility with 10K Ohm Sensors
The T6 thermostat is fully compatible with 10K Ohm sensors, ensuring precise temperature control. Models like AQ12C20, AC112-01, and AC130-01 can be seamlessly integrated for reliable performance.
8.2 Integration with Smart Home Systems
The T6 thermostat seamlessly integrates with smart home systems, enhancing convenience and control. Compatible with Z-Wave technology, it allows remote management via smartphones or voice commands through platforms like Amazon Alexa.
This integration enables advanced features such as scheduling, geofencing, and energy monitoring. Ensure your system supports Z-Wave for a smooth and efficient smart home experience with the T6 thermostat.
8.3 Compatibility with Hydronic Systems
The T6 thermostat is fully compatible with hydronic heating systems, ensuring precise temperature control. It works seamlessly with Honeywell’s 10K ohm sensors, such as the AQ12C20 and AC112-01, which are specifically designed for hydronic applications. Proper installation and connection of these sensors ensure accurate floor temperature monitoring and reliable system performance.
This compatibility allows for efficient integration into hydronic setups, providing advanced features like floor temperature limiting and optimal energy efficiency. Always consult the wiring diagram for correct sensor connections in hydronic systems.

Optional Features and Accessories
The T6 thermostat offers optional features like cover plates to hide paint gaps and floor temperature sensors for enhanced control. These accessories improve installation aesthetics and functionality.
Advanced features, such as smart home integration and geofencing, can be enabled for a more personalized experience. Refer to the manual for detailed guidance on these options.
9.1 Using the Optional Cover Plate
The optional cover plate is designed to conceal gaps left by older thermostats, ensuring a seamless installation. It comes in various sizes to fit different models. Simply attach it around the new thermostat for a polished look. This accessory enhances the aesthetic appeal without affecting functionality. Use it to maintain a uniform appearance on your wall, especially when upgrading from a larger thermostat.
9.2 Installing Floor Temperature Sensors
The T6 thermostat is compatible with 10K ohm Honeywell floor temperature sensors, such as AQ12C20, AC112-01, and AC130-01. These sensors provide accurate floor temperature readings, enhancing system performance. Ensure the area is clean and dry before installation.
Mount the sensor 1-2 inches from the heating element, avoiding direct contact. Once installed, the T6 thermostat will automatically detect the sensor. Refer to the Honeywell T6 Pro manual for detailed wiring instructions to ensure proper integration.
9.3 Enabling Advanced Features
To enable advanced features on your T6 thermostat, use the Honeywell Home app. Access settings for geofencing, smart scheduling, and voice control through compatible smart home systems. Enable remote access to adjust temperatures and receive system alerts. These features optimize energy savings and enhance comfort. Refer to the Honeywell T6 Pro manual for detailed instructions on configuring advanced settings for a seamless smart home experience.
Troubleshooting and Maintenance
This section provides essential troubleshooting steps and maintenance tips for your T6 thermostat. Address common issues, perform routine checks, and ensure optimal functionality and efficiency.
10.1 Common Installation Issues
Common installation issues include incorrect wiring connections, improper alignment of the thermostat with the UWP, and insufficient power supply. Ensure all wires are securely connected to the correct terminals and the thermostat is properly seated. Verify that the power is turned off before starting installation to avoid electrical hazards. If the thermostat does not turn on, check the circuit breaker or fuse. Consult the wiring diagram for accurate connections and refer to the manual for troubleshooting steps.
10.2 Maintenance Tips for the Thermostat
Regular maintenance ensures optimal performance of your T6 thermostat. Clean the screen gently with a soft cloth to remove dust or smudges. Replace batteries as needed, typically every 12-18 months. Inspect wires for damage or loose connections and ensure the thermostat is free from drafts, direct sunlight, and heat sources. For hydronic systems, check floor temperature sensors annually. Maintain a recommended installation height of 1.2-1.5 meters above the floor for accurate temperature readings.
10.3 Resetting the Thermostat
To reset the T6 thermostat, remove the batteries for 10 seconds or press the reset button if available. This restores default settings (64°F, heating mode, and 12-hour clock). After resetting, reinstall batteries and test functionality. Ensure proper installation and configuration to avoid issues. Regular resets can resolve minor glitches. Always refer to the installation manual for detailed instructions.
Safety and Placement Guidelines
Ensure the T6 thermostat is installed at least 1.2-1.5 meters above the floor, avoiding direct sunlight, drafts, and heat sources for accurate temperature readings.
11.1 Avoiding Drafts and Heat Sources
Position the T6 thermostat away from direct sunlight, drafts, and heat sources like radiators or fireplaces. This ensures accurate temperature readings and prevents malfunction. Place it at least 1.2-1.5 meters above the floor for optimal performance. Avoid areas near windows or doors where drafts may occur. Proper placement guarantees reliable operation and energy efficiency, aligning with Honeywell’s safety guidelines for outdoor and indoor installations.
11.2 Recommended Height for Installation
Install the T6 thermostat at a height of 1.2 to 1.5 meters above the floor for optimal performance. This height ensures accurate temperature sensing and minimizes tampering. It also aligns with standard wall heights, making it easily accessible for adjustments. Proper elevation helps maintain consistent room temperature readings and prevents interference from floor-level drafts or heat sources. Follow this guideline to ensure reliable operation and energy efficiency.
11.3 Preventing Direct Sunlight Exposure
Direct sunlight exposure can cause inaccurate temperature readings and damage the T6 thermostat. To prevent this, install the thermostat in a shaded area or use a shade cover. Avoid placing it near windows or areas with direct sunlight. This ensures accurate temperature sensing and prevents overheating. Proper placement maintains reliability and extends the thermostat’s lifespan. Always follow these guidelines for optimal performance and to avoid potential malfunctions due to environmental factors.
Congratulations! You have successfully installed your T6 thermostat. Turn on the power, test functionality, and ensure everything operates smoothly. For further assistance, refer to the Honeywell support resources or download the full manual for additional guidance.
12.1 Final Check of the Installation
After completing the installation, perform a thorough final check. Ensure all wires are securely connected to the correct terminals and the thermostat is properly mounted. Verify that the device powers on and initializes correctly. Check the alignment of the UWP with the thermostat and confirm that it snaps into place securely. Test the thermostat’s functionality by adjusting the temperature settings and observing the system’s response. Make sure there are no error messages or unusual behavior. Finally, review all safety guidelines to ensure the thermostat is placed appropriately, avoiding drafts, heat sources, and direct sunlight. This final check ensures your T6 thermostat operates efficiently and safely, providing optimal performance for your heating and cooling system. Additionally, double-check the time and date settings to ensure accurate scheduling and operation. If everything functions correctly, your installation is complete and ready for daily use. For any issues, consult the troubleshooting section or contact Honeywell support for assistance. Proper installation and configuration are crucial for reliability and energy efficiency, so take the time to verify each step carefully. By following these final steps, you can enjoy the full benefits of your new T6 thermostat, including improved temperature control and potential energy savings. Ensure all optional accessories, such as floor temperature sensors or cover plates, are correctly installed and functioning as intended. Your attention to detail during this final check will ensure a smooth and trouble-free experience with your new thermostat. Finally, familiarize yourself with the thermostat’s advanced features and programming options to maximize its capabilities and tailor it to your specific needs. This concludes the installation process, and you are now ready to enjoy the convenience and efficiency of your Honeywell T6 thermostat.
12.2 Testing the Thermostat Functionality
After installation, power on the thermostat and ensure the display activates. Test basic functionality by adjusting temperature settings and verifying system responses. Check advanced features like programmable schedules and smart home integration. If installed, confirm floor temperature sensors are functioning. Ensure there are no error messages or malfunctions. This step-by-step testing ensures all components work harmoniously, providing reliable temperature control and confirming successful installation.
12.3 Accessing Additional Resources
For further assistance, visit Honeywell’s official website to download the T6 Pro installation manual. Additional resources include customer support, online forums, and technical guides. Contact Honeywell’s customer service for personalized help. YouTube tutorials and authorized dealers also provide valuable installation insights. Ensure all resources are from trusted sources to maintain reliability and compliance with manufacturer guidelines.